To ensure the quality of the application, it is necessary to check regularly that the nozzles are not obstructed and that their jet is well formed.
This should be done with water at the beginning and at the end of the treatment. It can also be done in the field with spray solution if the spray quality is degraded during spraying.
WARNING
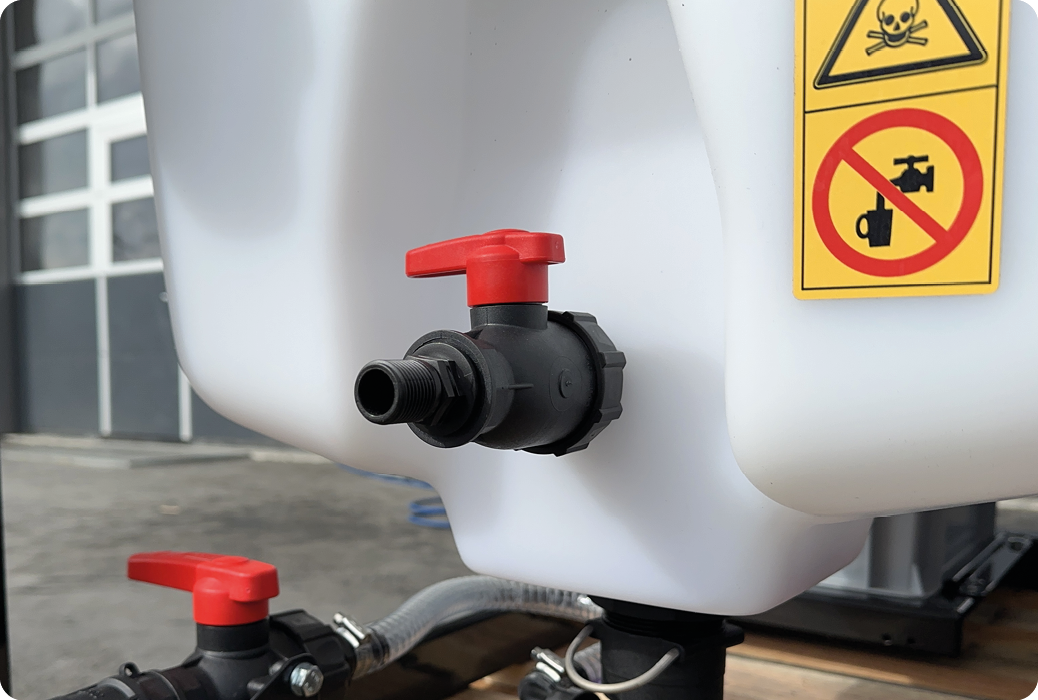
If this operation is carried out while the fluid circuit contains spray mixture, it is imperative to strictly respect the regulations concerning the use of personal protective equipment (Safety instructions) for herbicides, fungicides, insecticides, or fertilizers, as well as the nozzle cleaning procedure.
-
Make sure the pump is switched off.
-
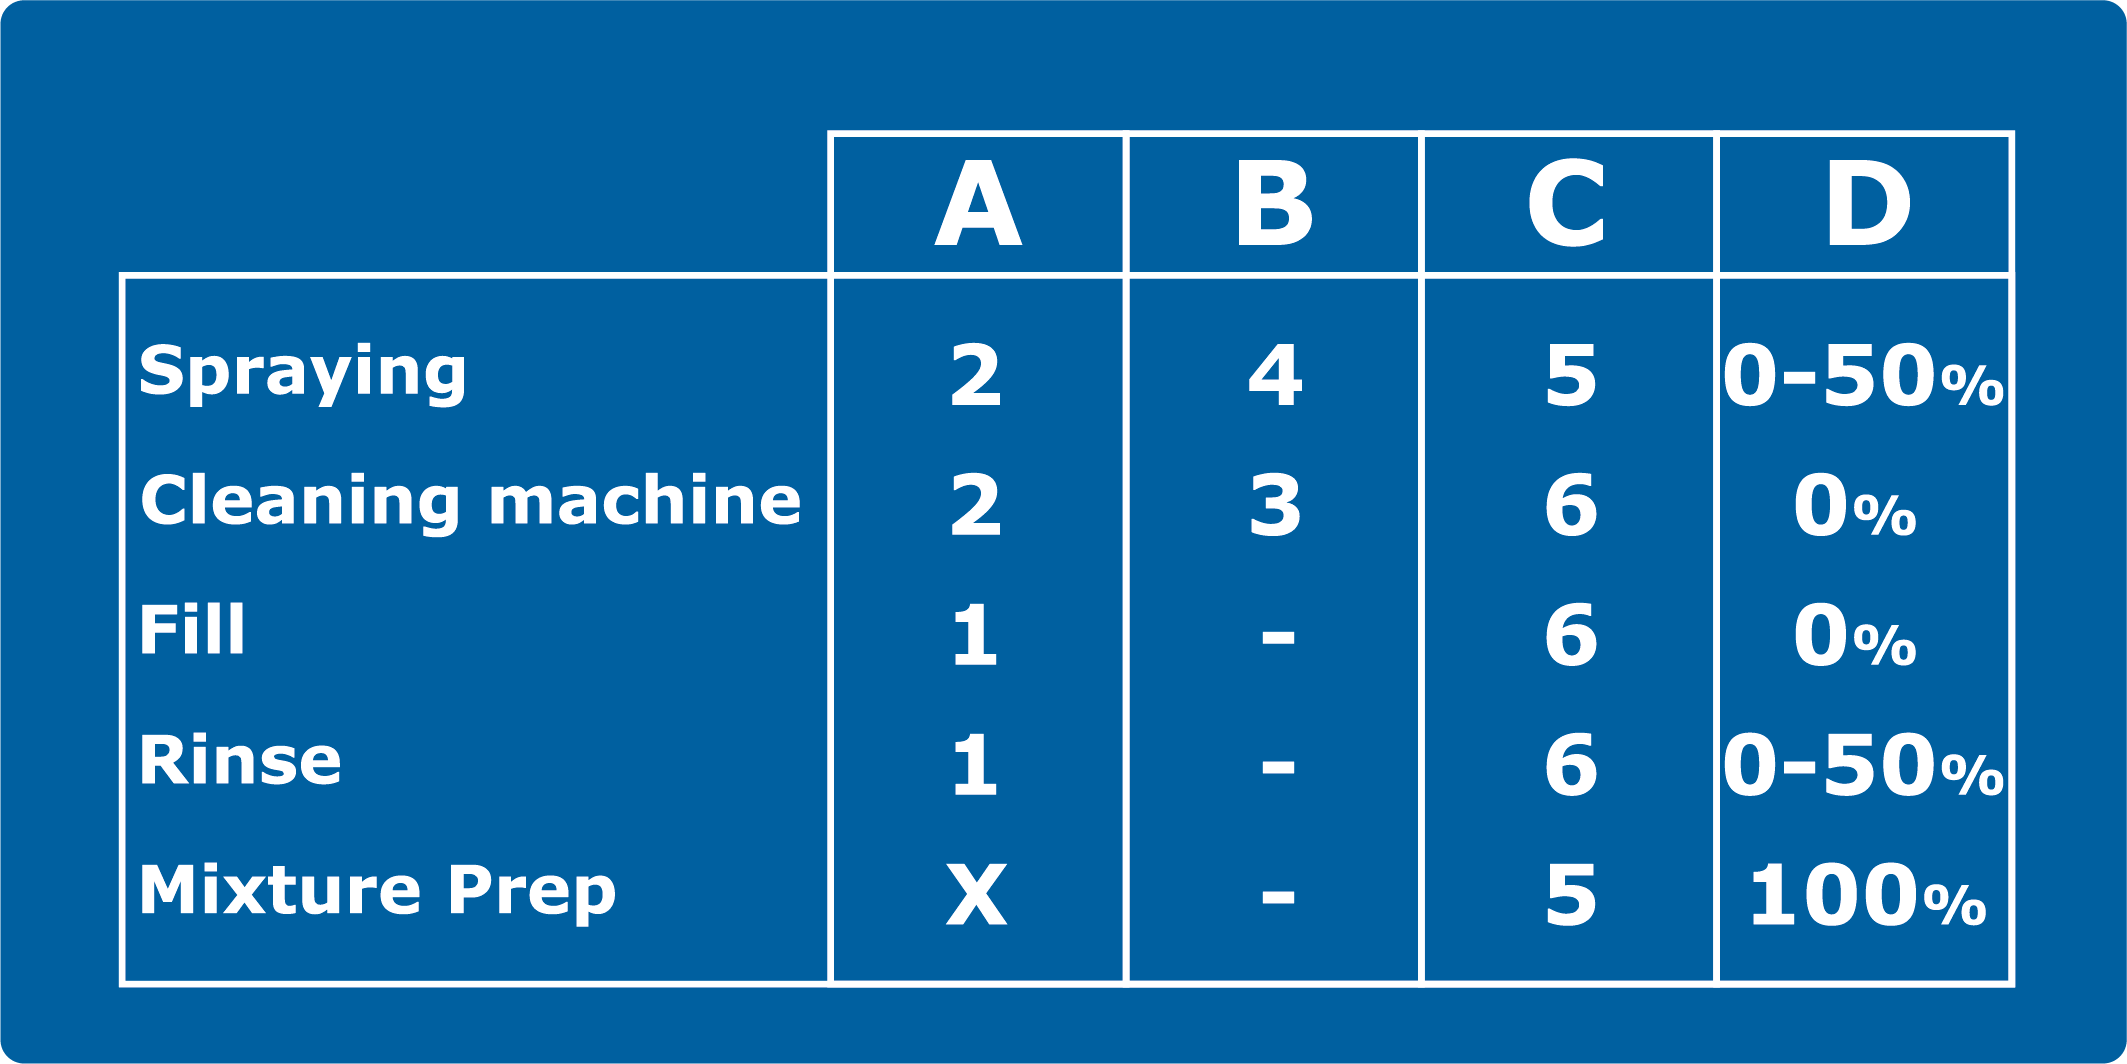
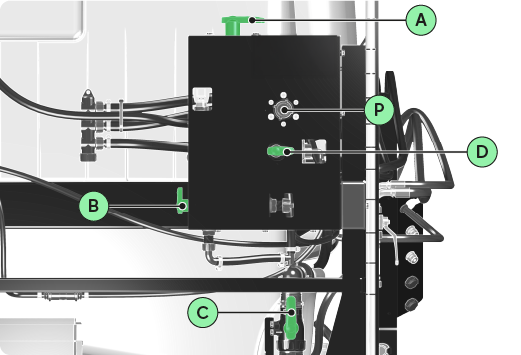
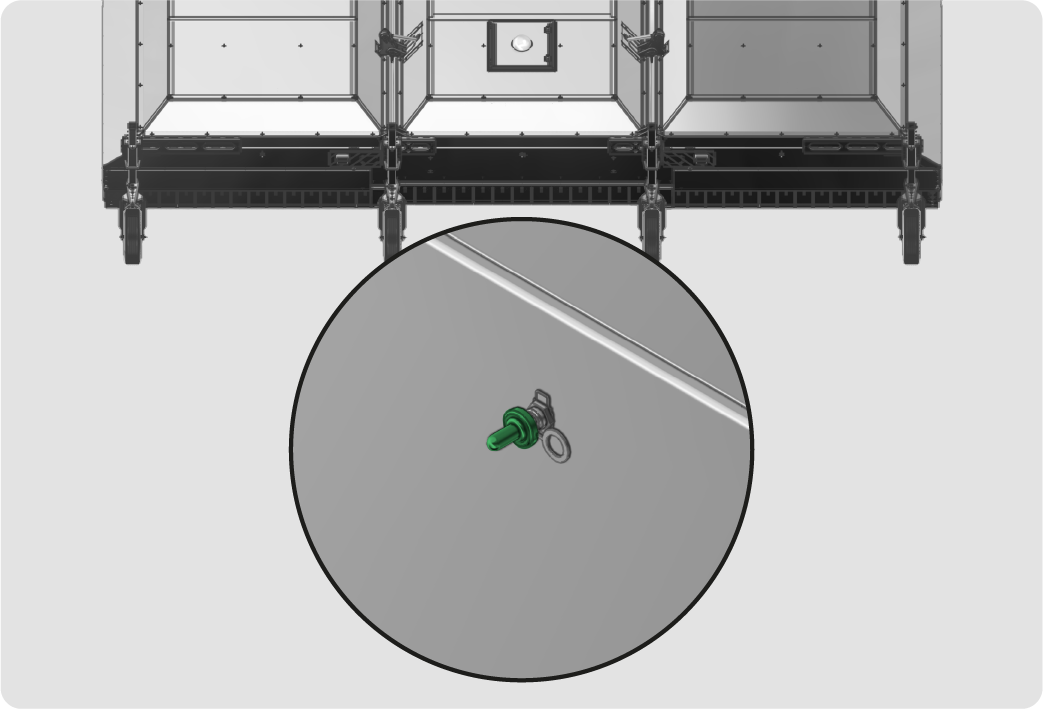
Set the valves to Spraying position mode.
INFORMATION
Do not use this 3D illustration as a reference. Please refer to the valve position modes table.
-
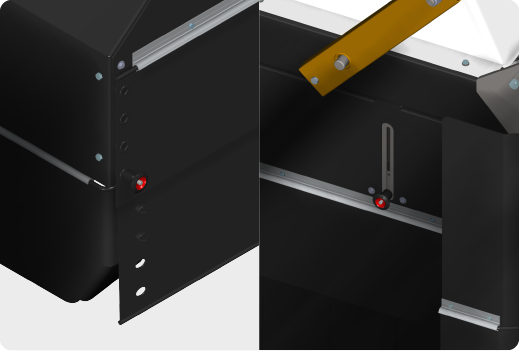
Raise the two rear tarps to their maximum level with the adjustment sliders. Each tarp has two sliders.
INFORMATION
The front and rear tarps of the central unit are not adjustable.
-
Lower the spray boom so that the nozzles are clearly visible.
-
Turn on the pump.
-
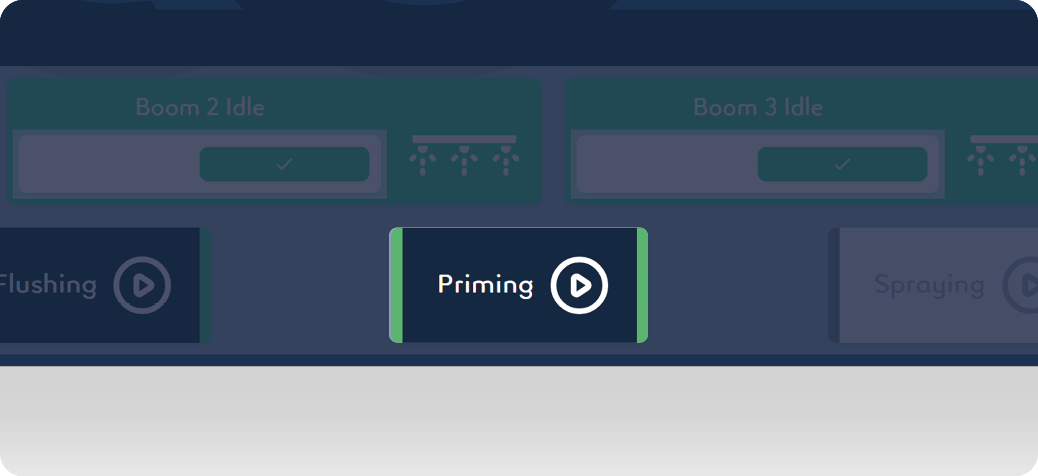
On the tablet, activate Priming mode for 2 minutes. This will expel the air from the nozzles.
-
Deactivate Priming mode.
-
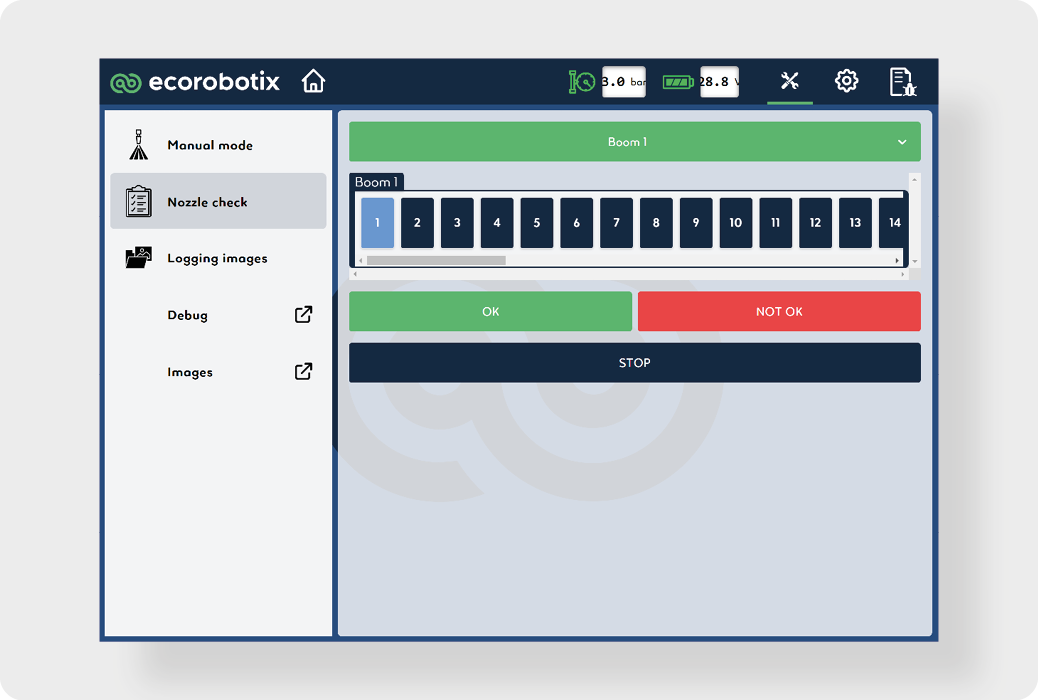
Click on the maintenance icon.
-
Press the Nozzle check button.
-
Select the Boom 1.
-
Select the nozzle 1. The nozzle will start spraying continuously.
-
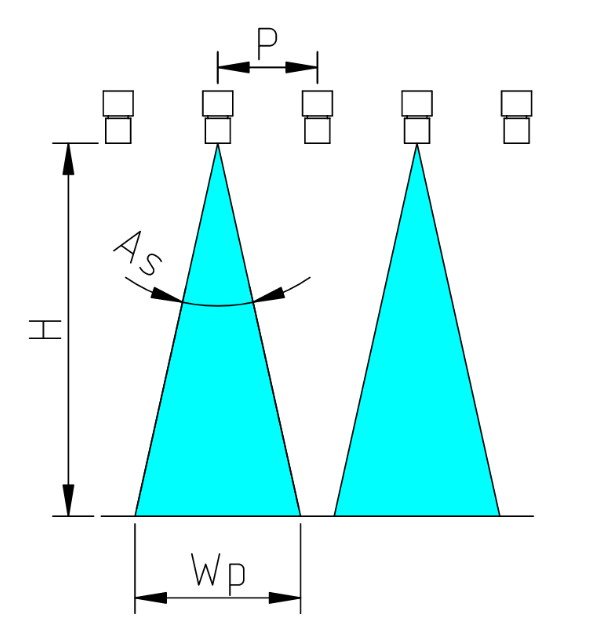
Visually check the spray quality:
-
The jet is formed, the nozzle is not completely clogged.
-
The jet shape is a flat triangle of similar proportions to the one shown, the nozzle is not clogged.
-
The spray pattern is smooth, there are no tugs due to air bubbles.
-
-
If the quality is good, click on the OK button, if not, click on NOT OK.
-
Repeat until you reach the last nozzle on the boom, then continue with the nozzles on booms 2 and 3.
-
Replace non-compliant nozzles with clean ones, or flush clogged nozzles with clean water.